
Let me preface this post by saying that I, in no way, am a good cupcake decorator. My usual way of decorating is using melting candies or fondant shapes. So, yeah, kind of a “yikes” on the piping technique of Cookie Monster’s fur.
Dude, gimme a break, it was the first #233 tip I’ve ever used.
BUT, I did have a reason to make these things, other than to torture and humiliate myself.
Our nephew Kane turned the big O-N-E recently. And due to some illness back in my husband’s hometown, we were forced to miss the big guy’s birthday party 😦
Side note: Did anyone get as sick as often as I did this winter? Dude, it sucked. I would have one week of not being sick and then BOOM! Sick again.
Anyway, since we missed the party, aunt Michelle promised to make him a cake or something. And honestly, cakes are fine, but I’m still a cupcake girl at heart.
So, my mind was going on about what kind of cupcakes to make. I came close to just making some funfetti looking cupcakes, but for some reason, I felt the need to try these cupcakes out.
We’ve all seen the meme out there with some poor sap who tried to make these things and they came out horribly, horribly deformed…and the caption reading “NAILED IT”
I was so afraid that it was going to be me, so I made these a day in advance so that I could have a backup plan.
I’m type A. Of course I always have a backup plan
I saw a few techniques out there. Some had huge domed-shaped heads, but that’s way too much frosting for me, let alone a 1 year old. Then, I saw some that merely dipped the domed frosting in sanding sugar. Yeah, that’s cute, but it didn’t look fuzzy….
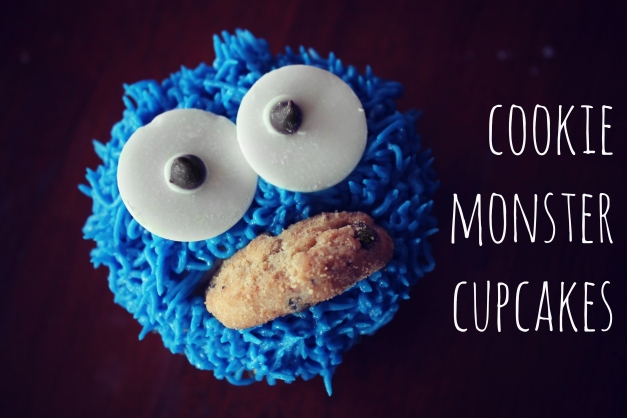
So, I tried the following technique and ended up with this result.
(oh, and I used my Classic White Cupcake recipe flavored with almond for this)
Instructions
You’ll need:
24 cupcakes
Buttercream
Wilton Royal Blue food coloring
16 in Disposable Wilton Decorating Bag
#233 Wilton Tip
24 mini Chips Ahoy cookies (or generic if you’re cheap :P)
1 bag of Wilton White Melting Chocolates
Mini Chocolate Chips
1) Bake your cupcakes per instructions
2) Make your buttercream. You can use the one on my Classic White Cupcakes post
3) Before putting your buttercream in the bag, add a fair amount of the Royal Blue food coloring. I honestly don’t remember how much I used…it was a lot to get this color
4) NOW, go ahead and put your icing in the bag and set it aside.
5) Once your cupcakes have cooled…carve a lil “smile” near the bottom edge of each cupcake

6) Now, cram that cookie in the mouth. Go ahead. Shove it in there
7) Here’s where I like to do the eyes. Take a small handful of chips and melt them down.
a) With a toothpick, place a small dot of white chocolate on the smooth side of a melting candy. You can place it anywhere…doesn’t have to be in the center. After all, Cookie Monster is a bit, well, kooky.
b) Place a mini chocolate chip on top of the dot. Think of the dot of melted chocolate as glue
c) repeat until you have 48 lil eyes staring at you.
8) Now, pipe your buttercream onto the cupcake. I started at the bottom of his mouth, worked my way around, and then filled in

9) Place two eyes on top and VOILA!

Cookie Monster!!! yum yum yum yum yum
xoxo
Michelle
